.
Uses for HDR Photography
All photos are from Alaska
Uses for HDR Photography
All photos are from Alaska
(Remember to click on the photo for a full page view)
Many times when making a photograph, we shoot a photo +/- one stop (or more) to be sure we get a reasonably close approximation for the correct exposure. We then select the one that more closely approximates what the mind remembers, that which the eye saw. In a way, this is a type of manipulation of the photograph. A secondary software manipulation could be (a) sharpening a slightly out-of-focus photo, (b) adjusting the endpoints of white and black to produce purer whites and blacks (levels), (c) increasing the saturation on a cloudy day to increase the level of color intensity to a remembered level, (d) etc., etc.
Occasionally we make a photo of something that has a dynamic range of light to dark that the camera is not capable of capturing in one photo. The eye may be perfectly satisfied with what it saw and a picture is burned into the mind. We view the produced photo and say, "this is not what I saw or remember". Enter the fairly new software, HDR (high dynamic range) manipulation.
There are a lot pf web sites which discuss the use of HDR which was initially developed for the purpose of taking 3 or more exposures and combining them to produce one photo. i.e. expose for the sky, expose for the mid-tones, expose for the shadows.
For the intent of this demonstration, I am only concerned with taking a single frame photo (which may be unusable or just not what I expected or remember) and turning it into a photo which more closely approximates what I remember. It may not be perfect, but is acceptable for a photo album, a trip reminder, a special scene or occasion.
Please leave a comment and your thoughts. I am really interested.
Following are 4 examples of such photos.
What would you have done to the original?
Remember, the final or manipulated photo can't be compared to a photograph taken in good lighting conditions with a normal dynamic range and in most cases won't resemble one.
Fog
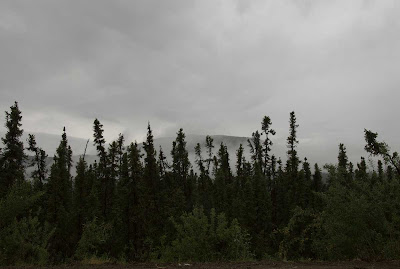 Original
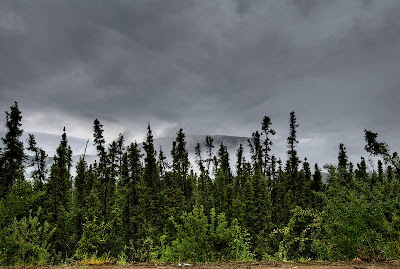 Corrected in order to
increase sky contrast and see detail in the foreground,
Misting Rain
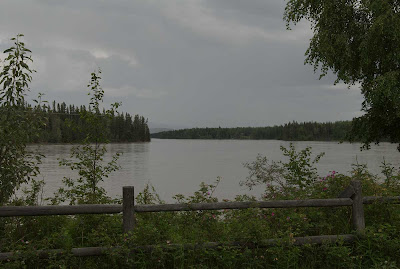 Original
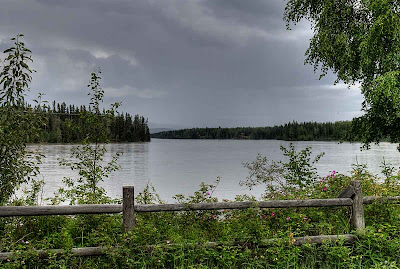 Corrected in order to increase contrast.
I did lose some of the effect of impending rain,
but gained color and detail in the fence row.
(I will probably go back and work on a compromise for this).
Finger Mountain Area
North of the Arctic circle
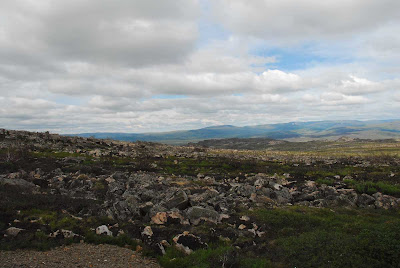 Original
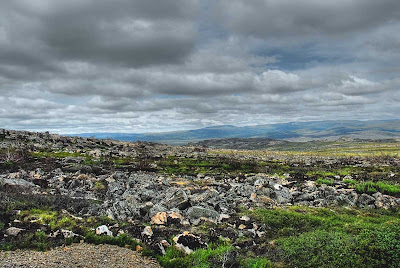 Corrected in order to
decrease the dynamic range and
bring out the color and texture of these beautiful rocks
Clouds Rising
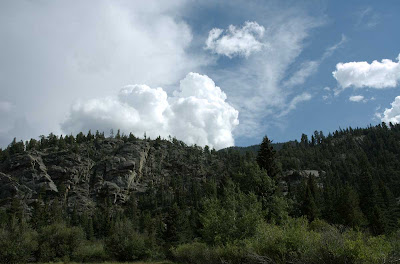 Original
(An acceptable photo to emphasize the sky)
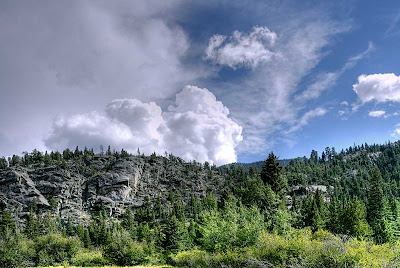 Corrected in order to
bring out detail and color in the foreground and cliffs.
It also shows the side lighting.
All of the photos are of scenes which had some special interest to us,
rather than just capturing a nice photograph
Photos by Troy and Martha
HDR Processing by Troy
Final exposure negotiated between Troy and Martha
HDR Processing by Troy
Final exposure negotiated between Troy and Martha
.


15 comments:
Love your corrections. I think this enhances our view. I do the same thing in mine. The camera can only do so much, but these enhancements really make the photos come alive. No more wasted shots. Pappy
Your enhancing is quite striking. You inspire me to rouse myself and acquire yet another tech skill.
Well done.
Troy: Thanks for sharing your knowledge. I have been working with my photos a little more but often like to show what I shoot.
The corrections you've made greatly enhance each photograph. I (currently) don't know enough about photography, or the manipulation of photographs, to make any sort of intelligent comment about what I *might* have done to the original photo. What I *do* know is that the end results you show us here are beautiful. I am unable to choose a favorite; I would happily look at each of these every day.
Thanks for the mini-tutorial, Troy. Everything I learn makes me realize how much I do not yet know. Life is a never-ending learning process.
My camera has a feature where you click it once and it shoots three photos in quickly in a row, lower exposure, normal, and higher. I've never played with the feature but after reading this entry I may have to experiment.
Yup, just what I do with many of my photos... but maybe not as well as you. I don't know about compromising on the one with the fence... I like the depth it gives the photo.
Y'alls site stays in my drop-down bar... love the pics!
I think the type of correction depends on the mood and details you want to convey in the photograph. Ansel Adams was a master at exposure in the field and also a master at printing in the darkroom. When I was using a manual film camera, I would often bracket the exposure and select the best print. With my digital cameras, I still do that using the camera's metering by pointing more to the light or dark elements in the picture. As to your four examples, I prefer the original in the second example and the corrected in the other 3. It really is the preference of the person who takes the photo to decide how to display it. Thanks for your comment on my Saturday post. I usually get to Ramblings Around Texas a couple of time a week. I enjoy your Alaska series and your info on the wildlife.
Excellent treatment here. i'm like very much to play with hdr and i use this technique a lot. for sure i'm not an expert but i know that this technique can transform the photo.
Thank you for thes how! I quite agree with your corrections, but as one who has not tried HDR - how do you manage to do that with just one picture? I have always understood that you need at least three with more or less exactly the same view (meaning tripod) and three different exposures? Or did I miss something?
I just read Rune's comment and always figured that as well....
I'm intrigued with your photos as well and think the procedure is outstanding as it does enhance details you just do not see the first time... remarkable!
~Michele~
Mountain Retreat- Canada
Thank you for the lesson! Most informative!
Very good examples! You're showing the strength of the method!
Cheers, Klaus
Troy, it's interesting that you raise this subject as Gus and I had just such a problem with the photos he took of Cave Creek Canyon in the evening. The bright light of the setting sun bounced off the rocks and cliffs, washing them out, but the trees came out rich green and dark. Since we are STILL learning how to use this new digital camera, it was quite frustrating to get home and see how the pics came out. I know about braketing with my old 35mm. I need to learn how to use that feature on the D80. So many buttons, so little time, but we have run into a problem since Gus accidently turned on some feature that says "highlight" and we can't find the menu or command to shut it off! I've looked through the manual that is as thick as a Bible to no avail! I am so frustrated right now! I am going to try again, but I know we are better photographers than this and I know this camera can do better if I can just learn to decipher all these commands! Sorry. I didn't mean to rant. You did ask, though! :)
These photos are quite interesting. The effects are good, but not natural looking. So, not a good solution for me. I prefer those subtle adjustments that are invisible when viewing the finished photo. These are unworldly, which could be great, but don't seem "real" to me. Thanks for this! Guess I'll just have to wait for good light.
I liked the corrected Finger Mt. shot, but I would so liked you to show the namesake. I've been there, and it is quite th most wonderful view point. We drove to the Arctic Circle to spend the night. Did you enjoy the Haul Road?
Post a Comment